The garden is waking up. Spring is here. And I only have two weeks left until my hiking trip. We leave for a week at the end of May. This puts a deadline on a lot of my garden projects. I was also almost out of plastic trays. So, I decided to try soil blocking.
Watch on Peertube Donate to support
The garden is waking up. Spring is here. And I only have two weeks left until my hiking trip. We leave for a week at the end of May. This puts a deadline on a lot of my garden projects.
If you are new here, know this: I hate deadlines. I’m not good with deadlines. They make me nervous.
Despite all my neighbors collecting toilet paper rolls for me, I didn’t have enough to start seeds in. I was also almost out of trays from my mom.
So, I decided to try soil blocking. I’d ordered a cheap blocker online. I hated the thing. But I had neither the money nor the time to wait for a good-quality original from the UK.
So, I asked my husband to print me some soil blockers for testing. If this worked well, I’d save up for a good-quality set for next year.
Soil blocking is a way to start seeds without trays. You make compacted little soil blocks instead.
Usually, the presses are metal and you make more blocks at once. But this is a trial run.
You mix water and soil, and then you essentially build a sand castle from soil. The right ratio of water and sand/soil and the right amount of pressure are all you need.
I think this part is a lot easier with a proper unit. They have handles that let you press better. But this barely functional tiny unit was enough to convince me of soil blocking. Next year, we’ll do this properly.
Time to plant some small seeds into these tiny blocks.
My husband and I both struggle with respiratory issues, so I’m growing some mullein for tea.
I also planted some stevia. (Sorry for the bad camera angle…) The living room is the only place where I have the space to leave this out for a few days.
Making the blocks is exhausting for the fingers, so I spread it over the first days of May.
Tray after tray filled up until the living room was covered in not-yet-growing things.
I’m very curious to see how the soil blocks hold up–literally and figuratively. As I didn’t want any peat in my soil, I sifted my potting mix to make these.
The larger block size had finished printing. I’ll need that once the tomatoes are ready for potting up.
In the meantime, I made medium blocks and planted all the larger seeds in them. Three cantaloupes and six water melons. Let’s see how they grow.
I also planted quite a few nasturtiums. Their crinkly seeds are one of my favorites.
For hours, I sifted soil, added just the right amount of water (or more soil…) and pressed blocks.
Supposedly, seedlings are happier in soil blocks. Their roots won’t grow in circles when they hit air. Instead, more dense roots form that are ready to grow once they hit soil when planted.
With my tiny-scale setup in the living room, this was a lot of work. I hope it was worth the struggle.
I decided to use the last plastic tray for lettuces, kale, and some chard for a neighbor.
I really didn’t like working with trays at all. If the blocks hold up, I’ll do this differently next year.
There is still quite a bit of usable wood in the garden. Once I’ve made it through the spring planting, I have plans. The larger pieces will stay in the garden for various projects but I want to build seed trays from the rest.
But first, let’s finish this planting marathon.
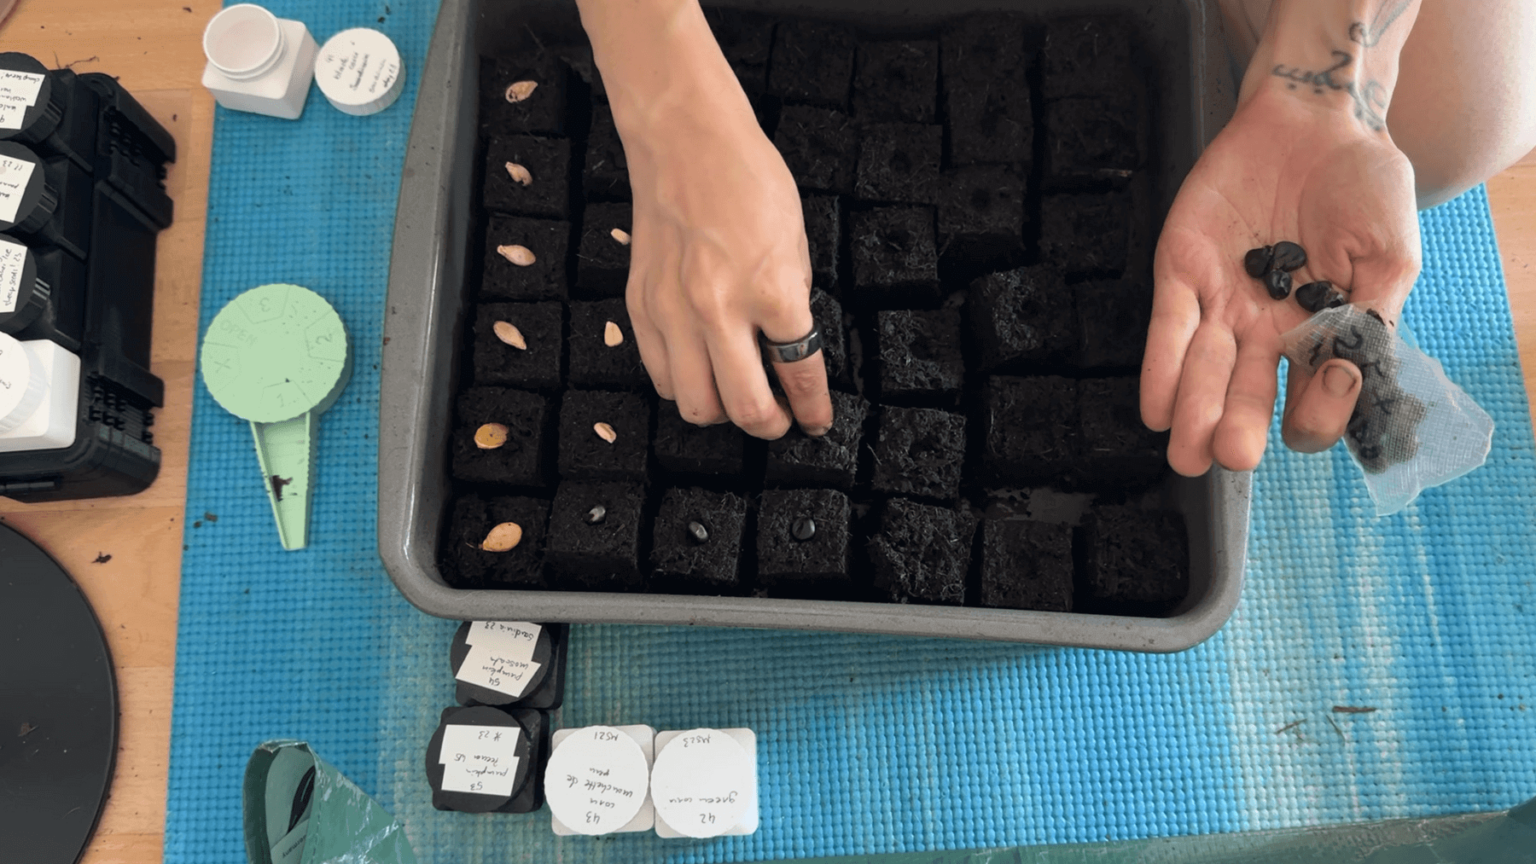
I used the seed bottles as temporary labels. Labeling is one of the downsides of seed-blocking. I can’t use the wooden sticks easily, because they fall over in the gaps. Tape might have been good for labeling.
I will be growing three varieties of corn this year, all three heritage varieties, so no sweet corn. I want to grow a traditional three-sisters bed with corn, beans, and squash. Sweet corn puts more of the energy into the sweet kernels, less into a strong stem that can support beans.
The black corn is from a small farm in Southern Europe. The green corn and Monchette de Peru are all saved from plants grown in the area. I got them at a seed library. I only have five kernels each of the green and Peruvian corn, so I planted a lot of black corn.
We had the chance to try Inca cucumbers last year, and both of us were big fans, so I saved the seeds.
I have never grown any of the things I planted here. Let’s hope countless hours of watching and reading help.
It didn’t take long for the first seeds sprout.
The first tray of tiny seeds was starting to show some growth. Almost everything is already up albeit tiny.
The lettuces, kales, and chard are growing in exceptionally well. Nothing on the peas yet, though. None of the peas, beans, and corns are up yet. But it has only been four days since they went in.
The tomatoes and peppers seem happy in their tiny soil blocks covered in what I sifted out.
The leaves of the blueberry are losing the cold-weather red. Spring really is here.
So long, and thanks for being here.